Managing Authentication
Authentication into the Web Console is available through any of three methods: - Local password authentication - Google OAuth integration - Keycloak OAuth2/OpenID Connect authentication - LDAP integration
EndPoint Monitor will be set up with a local password authentication on initial installation. It is recommended to use one of the single sign-on options where possible.
You can configure any number of authentication providers as required. Users are individually assigned to a specific authentication provider when added allowing for switching between providers when ever required. You can only however have a single Google OAuth authentication provider due to limitations of providing a single login screen.
Adding Authentication Service
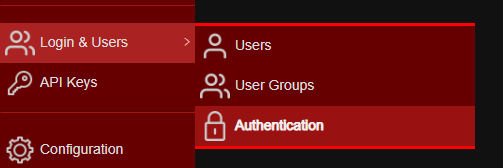
- Login to Web Console and select Login & Users then Authentication from the main menu.
- Click
Add . - The Create Authentication Service window should now show.
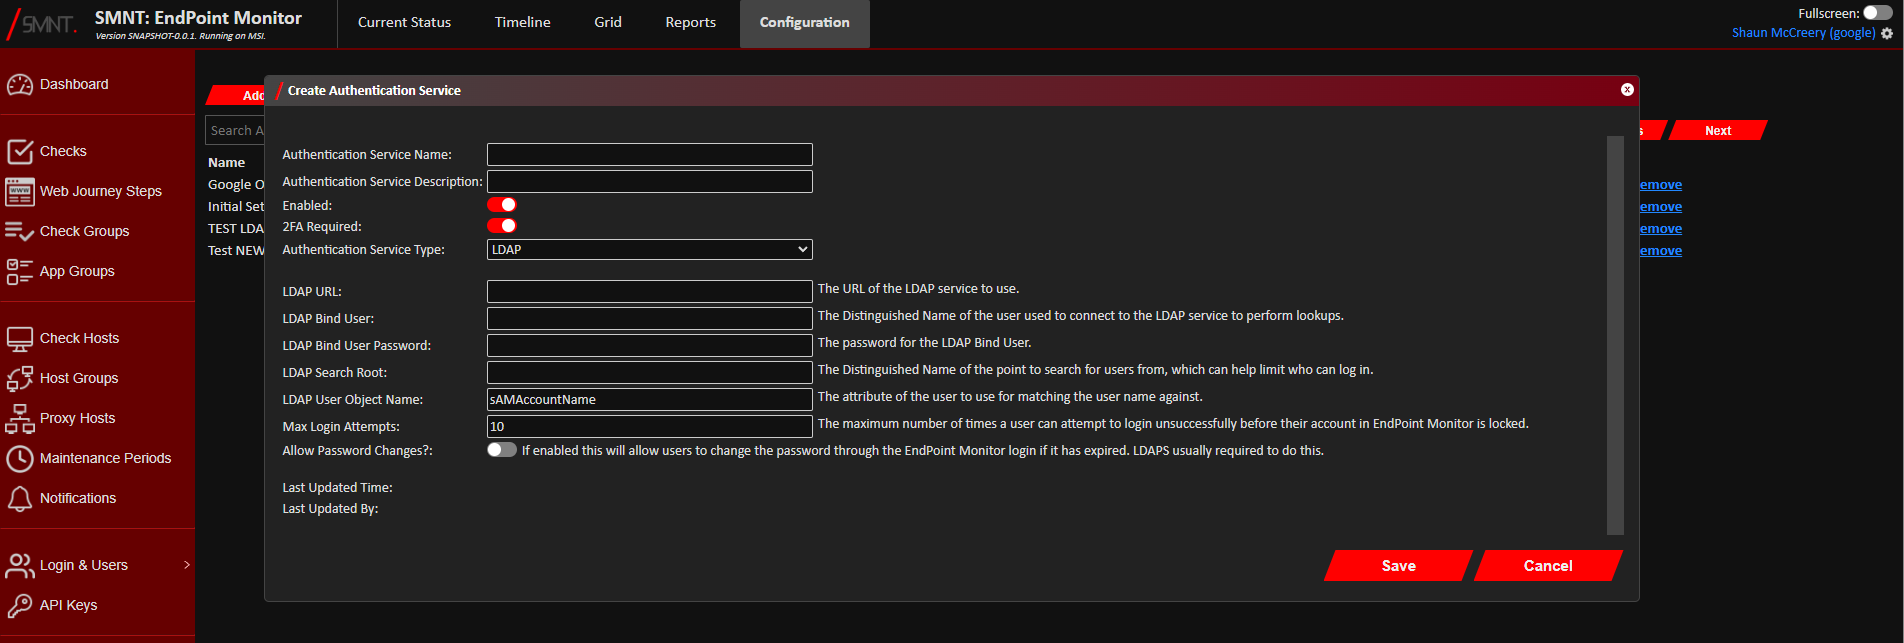
Configuration definitions can be found below under Configuration Definitions. - Click
Save .
Once successfully saved, if you have added a Google OAuth login, this should now automatically be showing on the login screen, if it fails to show you may need to restart your EndPoint Monitor controller(s).
Amending Authentication Service
- Login to the Web Console and select Login & Users then Authentication from the main menu.
- Click
Edit on the line of the Authentication Service you want to edit. - The Edit Authentication Service window should now be showing, populated with the current configuration of the
selected authentication provider.
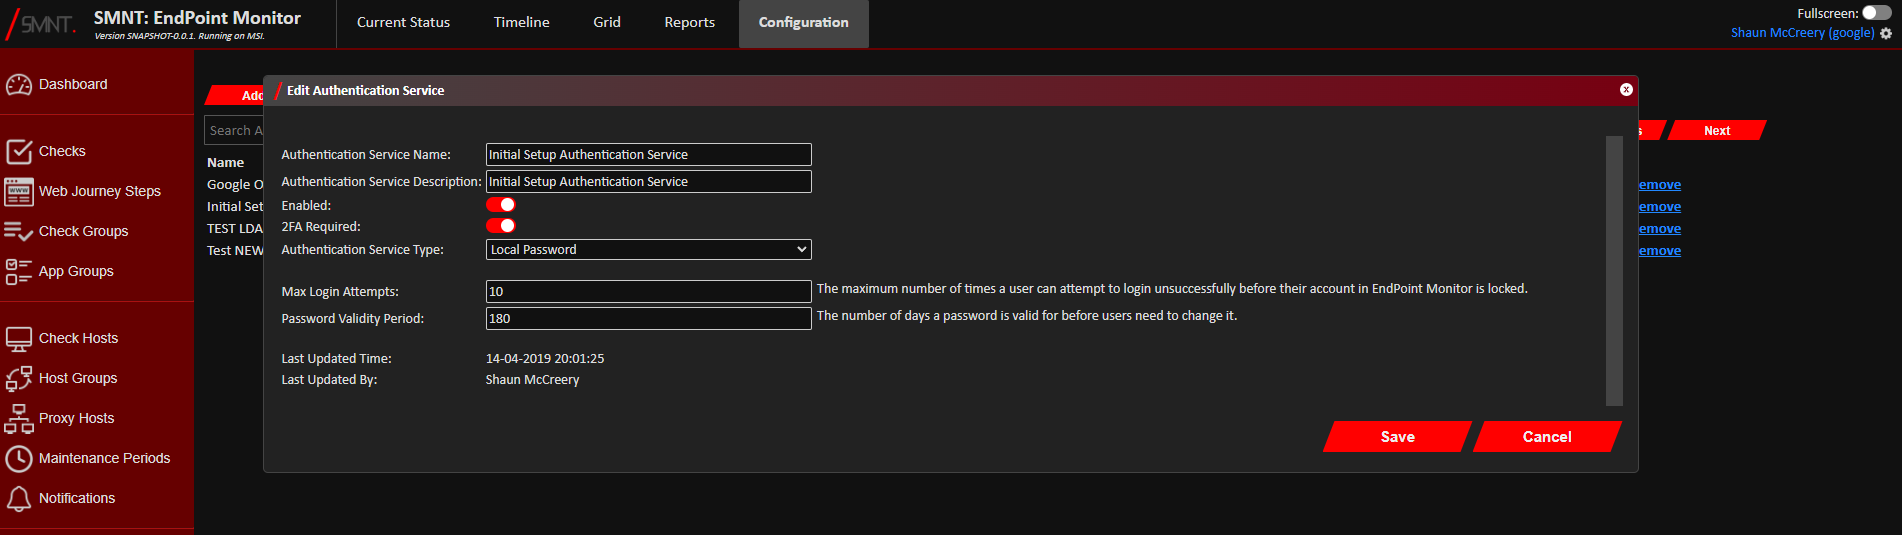
Edit as required. Configuration definitions can be found below under Configuration Definitions. - Click
Save .
Your changes should immediately take effect, although you may want to restart your EndPoint Monitor controllers on any changes to Google OAuth to help flush caches.
If you have disabled the selected Authentication Service then any users linked to this will no longer be able to log in.
Removing Authentication Service
Note: You can not delete an Authentication Service if it's linked to any user accounts.
- Login to the Web Console and select Login & Users then Authentication from the main menu.
- Click
Remove on the line of the Authentication Service you want to remove. - Click
Remove to confirm you want to delete the selected Authentication Service. - You should see confirmation the selected Authentication Service was deleted in the bottom right notification area
of the web console, and the list of Authentication Services should no longer show the service you deleted.
If there was an issue with deleting the Authentication Service then an error should be shown with the reason for it, e.g. it is currently linked to existing users.
Configuration Definitions
| Name | Description |
|---|---|
| Authentication Service Name | A name to describe your authentication service. This will be shown when referring to this service in other forms. |
| Authentication Service Description | A space for a longer description of the service or its use if needed. |
| Enabled | If the Authentication Service is turned off, all users associated to it will no longer be able to sign in. |
| 2FA Required | If enabled, all users associated to this Authentication Service will be required to set up local TOTP two-factor authentication to sign into the EndPoint Monitor web console. |
| Authentication Service Type | Select the way this Authentication Service will validate a users credentials. Choices are to use a locally stored password in EndPoint Monitor, Google OAuth Keycloak or LDAP. |
Google OAuth Additional Configuration
| Name | Description |
|---|---|
| Client ID | The Client ID found as part of your Google OAuth 2.0 configuration. |
| Proxy Host | Select a Proxy Host if controllers will need to use a proxy to reach out to Google APIs. |
Keycloak Configuration
| Name | Description |
|---|---|
| Login Button Text | The text to show in the login button that will added to the login screen to allow users to use this Keycloak login option. |
| Keycloak URL | The base URL of the Keycloak service to use. This must start with https://. Example, `https://keycloak.internal.mycompany.net/ . |
| Keycloak Realm | The name of the Realm in Keycloak that the Keycloak Client configuration sits within. The Realm is displayed in the top-left corner in the Keycloak Admin interface when looking at your Client configuration. |
| Keycloak Client | The name of the Client in Keycloak that is used for authentication. See Keycloak Configuration for how to set up a new client. |
| Username Identifier | The value from Keycloak used to match users within EndPoint Monitor. Email Address will use the validated email address from Keycloak to match against the Login Id in EndPoint Monitor. Keycloak Username will use the Keycloak username to match against the Login Id in EndPoint Monitor. |
LDAP Additional Configuration
| Name | Description |
|---|---|
| LDAP URL | The URL of the LDAP service to use. |
| LDAP Bind User | The Distinguished Name of the user used to connect to the LDAP service to perform lookups. |
| LDAP Bind User Password | The password for the LDAP Bind User. |
| LDAP Search Root | The Distinguished Name of the point to search for users from, which can help limit who can log in. |
| LDAP User Object Name | The attribute of the user to use for matching the user name against. |
| Allow Password Changes | If enabled this will allow users to change the password through the EndPoint Monitor login if it has expired. LDAPS usually required to do this. |
| Max Login Attempts | The maximum number of times a user can attempt to login unsuccessfully before their account in EndPoint Monitor is locked. |
Local Password Additional Configuration
| Name | Description |
|---|---|
| Max Login Attempts | The maximum number of times a user can attempt to login unsuccessfully before their account in EndPoint Monitor is locked. |
| Password Validity Period | The number of days a password is valid for before users need to change it. |
Google OAuth Configuration
To use the Google OAuth authentication type, some client credentials need to be created within the Google Auth Platform within Google Cloud.
Setting Up OAuth2.0 Client Configuration
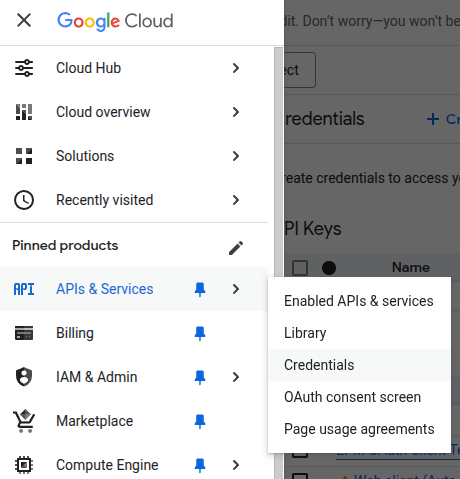
- Once logged into the Google Cloud console, navigate to the Credentials section in the menu, under APIs & Services.
- Click the Create credentials button on the top options bar.
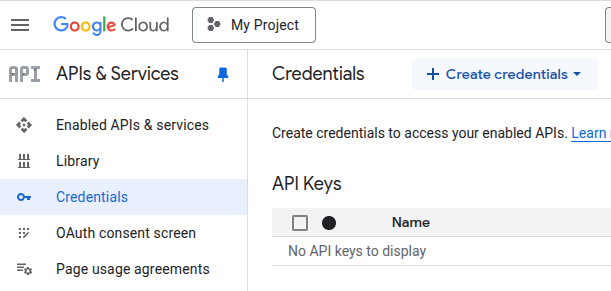
- Select the OAuth client ID option from the Create credentials menu.
- Select Web application from the Application type drop down list.
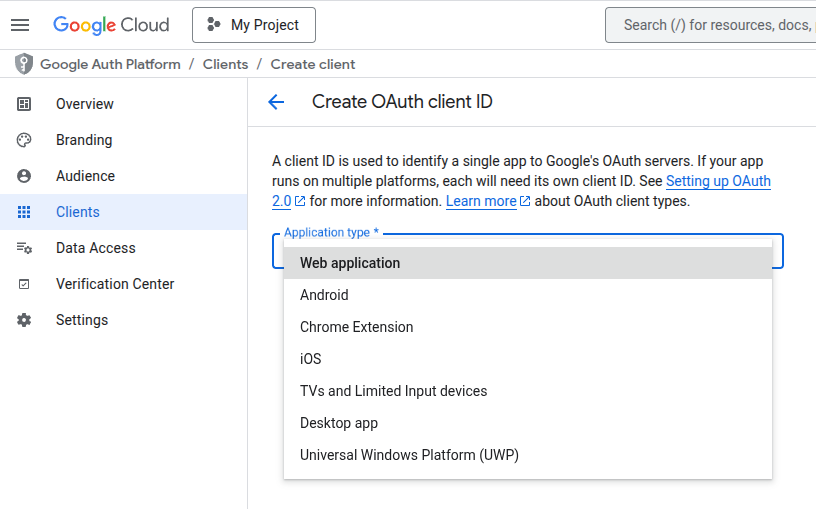
- Enter any name to identify what this client is used for in the Name field now shown.
- Enter the base domain of your EndPoint Monitor installation into the Authorized Javascript origins, and the same
base domain with
/auth/googleadded to the end in the Authorized redirect URIs field.
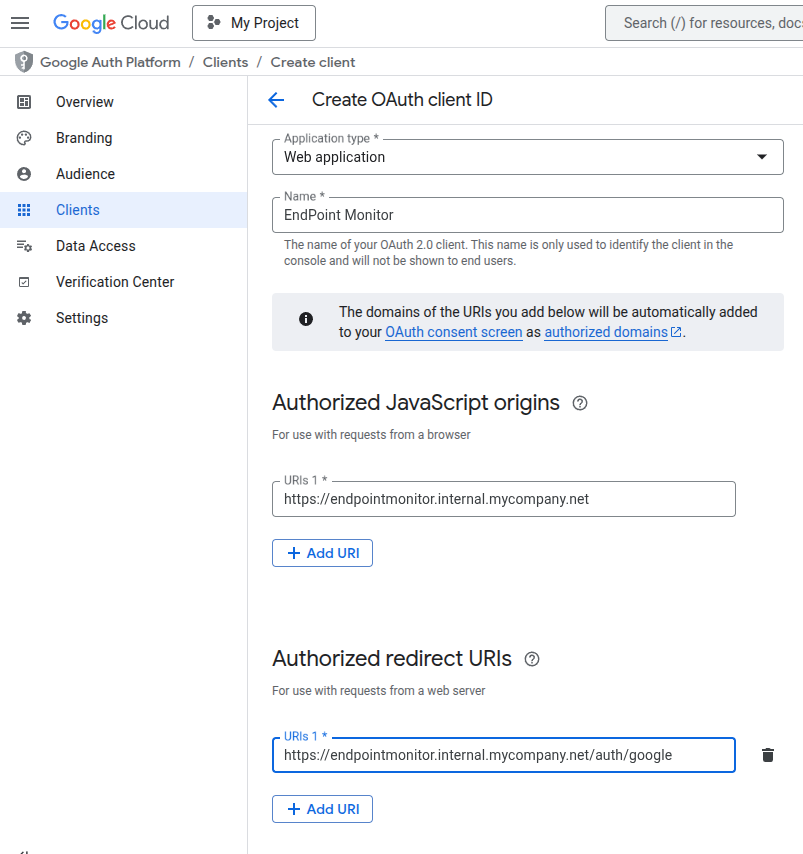
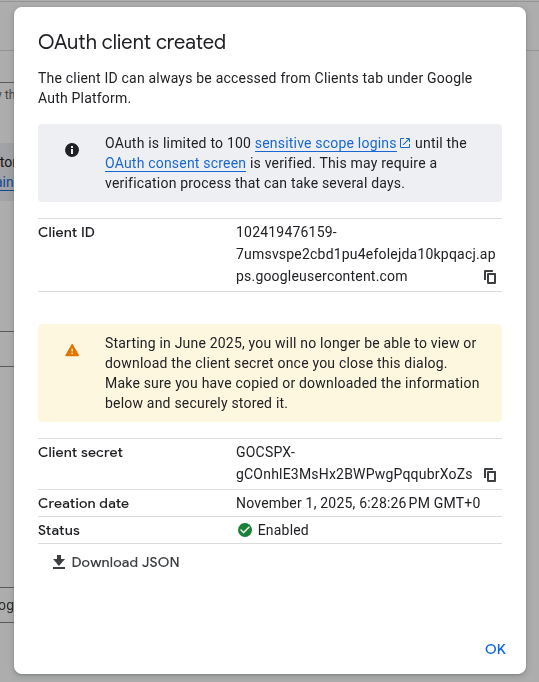
- Click Create at the button of the page to save the new OAuth client configuration.
- The OAuth client created confirmation box should now show, which contains teh Client ID and Client secret values
you need to then provide when setting up an Authentication Service using Google Oauth.
Keycloak Configuration
Keycloak is an open source identity and access management application that can be used to help organisations provide a single sign-on solution, and to provide a single solution to abstract multiple authentication provides behind.
To use the Keycloak authentication type, you will need access to a Keycloak installation and have the ability to configure new clients within it. Information on setting up Keycloak can be found here.
Setting Up Keycloak Client Configuration
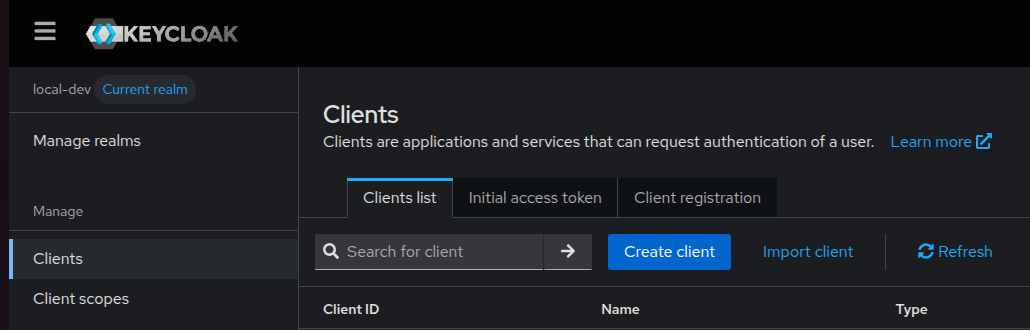
- Sign in to the Keycloak admin interface, and within the Realm you wish to use for EndPoint Monitor authentication,
click Clients from the left-hand side menu options, and then click the Create client button.
- The Create Client General Settings options should now be shown. The Client Type should be set to OpenID Connect.
Provide Client ID and Name values to identify what this client is used for. The Client ID must be unique for the Realm
you are using.
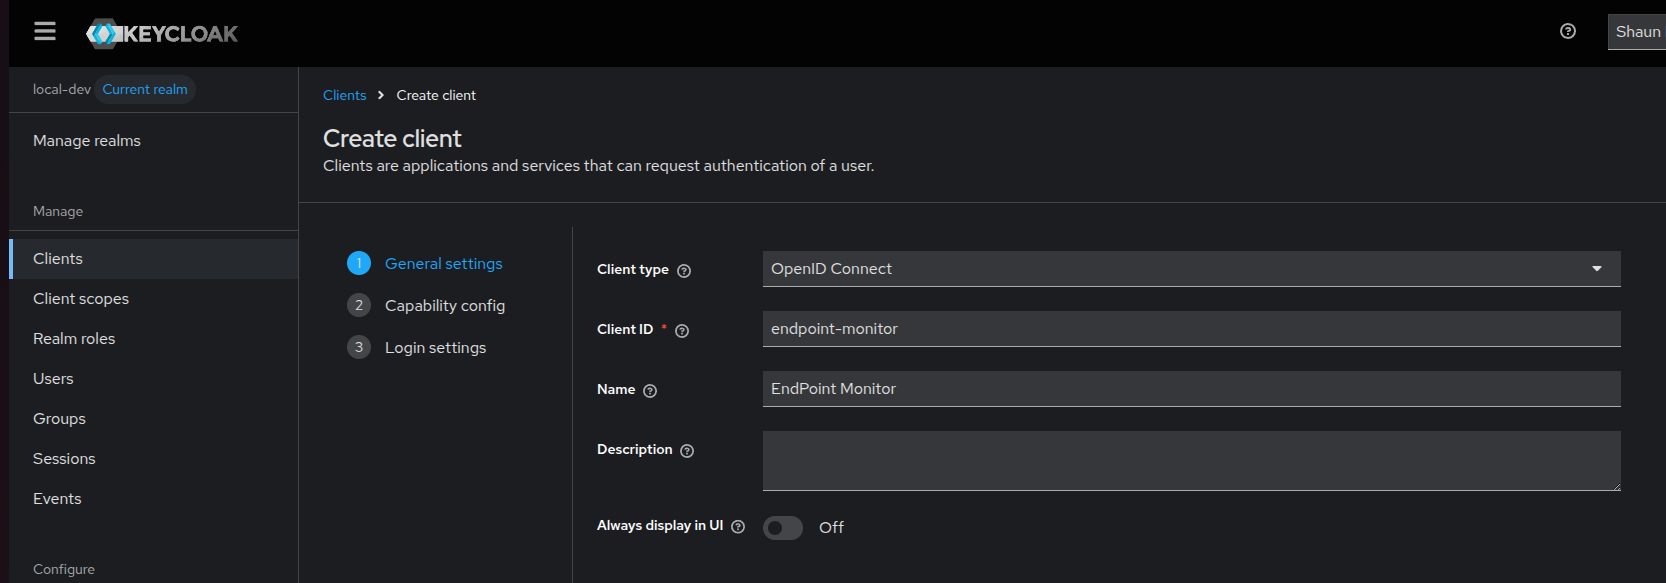
- Click Next at the bottom of the page.
- The Capability Config options should now be shown. The defaults settings should be suitable, but S256 should be
selected from the PKCE Method options.
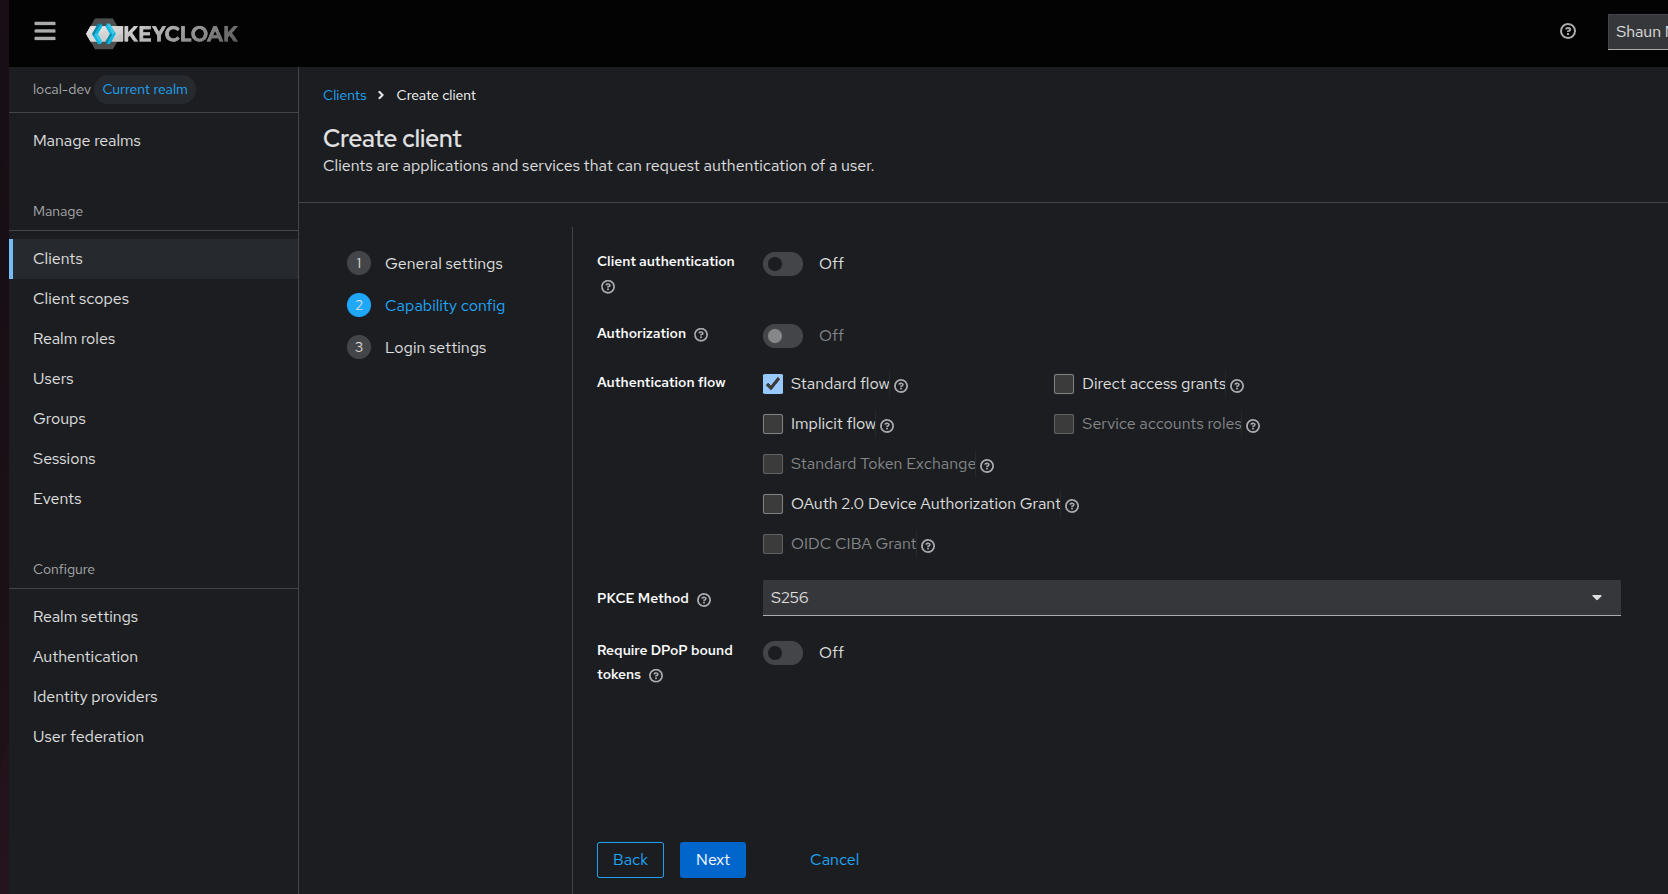
- Click Next at the bottom of the page.
- The Login Settings options should now be shown. Enter the base URL of your EndPoint Monitor installation in the
Root URL, Home URL and Web Origins fields. In the Valid Redirect URIs and Valid Post Logout Redirect URIs the same
base URL should be entered, followed by a
/*.
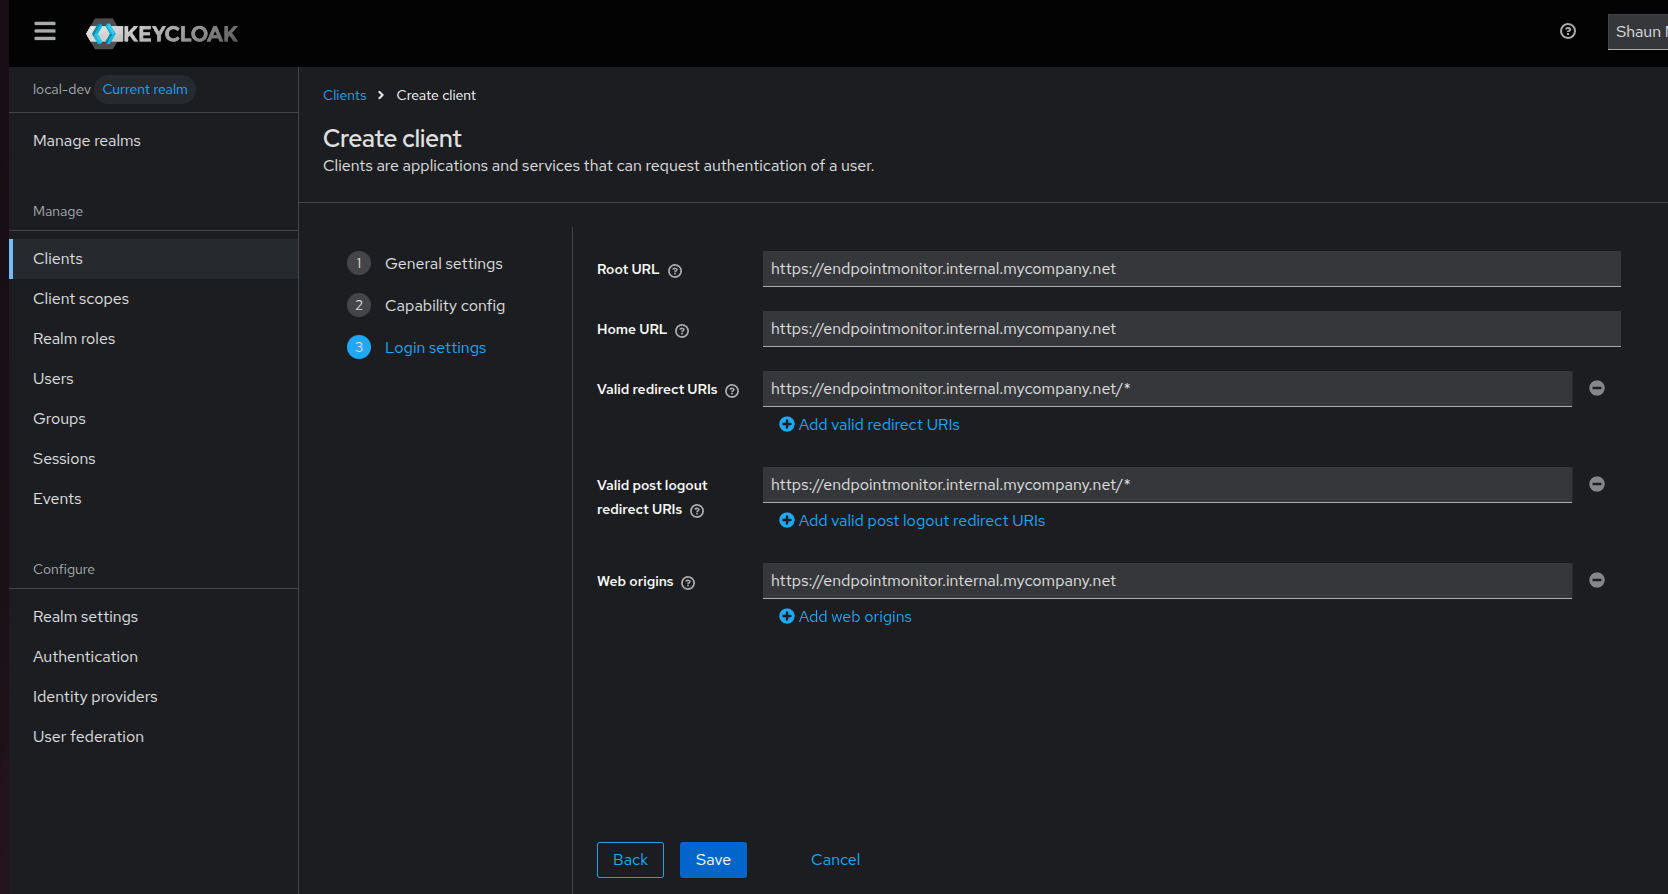
- Click Save at the bottom of the page.
This Keycloak client should now be ready to use. See Adding Authentication Service to now add an Authentication Service using this new Keycloak client.
Be aware, if using a Keycloak implementation that is sat behind an self-signed certificate or a TLS certificate provided by your organisations internal Certification Authority, then you will need to make sure that the certificate is trusted as part of your Controller Configuration.